Graeter's Ice Cream has always been one of those elusive ice creams you hear about but never really buy. Not because of any other reason than it wasn't readily available in the area. You had to go to specialty stores or be in Cincinnati, where it's made. But alas my Cucina loving pals, Graeter's Ice Cream is now available at Giant Eagle stores!
The five generation family-owned business since 1870, has pioneered the French Pot process of making only 2 gallons of ice cream at a time with all natural ingredients and it shows. I have been lucky enough to taste the insanely delicious black raspberry chip as well as the super rich chocolate chocolate chip, vanilla chip and mint chip. All are so dreamy and wonderful, but for me, being the chocoholic that I am, it's chocolate chocolate chip all the way (with a little bit of black raspberry chip mixed in for good measure). The chocolate chips used are the best I have ever tasted. They are more like shards in different sizes and shapes and quite frankly some of them are huge! Good news for me! The more chocolate the better.
It's important to support smaller companies and Graeter's qualifies... and the fact that it's an Ohio based company is something that appeals to me too. It doesn't hurt that it's freakin amazing ice cream. Next time you're in Giant Eagle, check it out. I know you will not be disappointed.
I cook. I bake. I eat out. And listen to great music while doing it. Then I write about it. Enjoy!
Welcome!
Welcome to the new and improved Carano's Cucina. I make a lot of kick ass food and go out to some amazing restaurants. Take a look around and make yourself at home :)
Showing posts with label chocolate. Show all posts
Monday, May 21, 2012
Monday, October 25, 2010
Chocolately Peanut Buttery Goodness
The two most perfect foods, together. I do it a lot. I can't resist. Peanut butter and chocolate need to be together in any way, shape or form. In this incarnation, it's chocolate cupcakes with a peanut butter cream cheese frosting.
Start out with any chocolate cupcake recipe you like. I happen to have buttermilk in my fridge and wanted to use it up, so I used a standard buttermilk chocolate cupcake recipe. Start with a stick of butter, softened and 1 1/2 cups of sugar in your mixing bowl and cream together until light and fluffy.
Once it's fluffy, add 2 eggs, one at a time and beat well after each addition. Then beat in 1 teaspoon of vanilla.
In another bowl, combine 1 1/2 cups of all purpose flour, 1/2 cup of cocoa powder, 1 teaspoon of baking soda and 1/4 teaspoon of salt.
You will also need to combine 1/2 cup of buttermilk with 1/2 cup of water. Then add the dry ingredients to the butter mixture, alternating with the buttermilk mixture. In other words, add some dry then some wet, some dry and some wet, until all ingredients are incorporated. Then fill your cupcake cups 2/3 the way full and bake at 375 degrees for 15-20 minutes (make sure your toothpick inserted into the middle comes out clean).
Let the cupcakes cool in the pan for 10 minutes, then remove from the pan and let cool completely on a rack.
While the cupcakes cool, it's time to make this kick ass icing! You will need an 8 oz. block of cream cheese and a stick of butter, both softened, to start.
Beat until smooth and creamy. When you have a nice smooth butter/cream cheese mixture, add 1/2 cup of peanut butter. You can use creamy or chunky, but natural is probably not a good idea because of the oils. Beat in the peanut butter then add 1 1/2 cups of sifted powdered sugar. Beat until fully incorporated.
Ice cupcakes however the heck you want, but I suggest you load it on! This frosting is all kinds of yum and you don't want to short change yourself. Although, I suspect the leftovers might be pretty yummy on just about anything... toast, a bagel, a spoon, a hubcap, whatever. And feel free to add a bit extra peanut butter if you want. Personally, I think next time I make it I'm going to up it to 3/4 cup.
Buon Cibo mia Amici.
Ingredient lists - Cupcakes:
1/2 cup butter, softened
1 1/2 cups sugar
2 eggs
1 t. vanilla
1 1/2 cups all purpose flour
1/2 cup cocoa powder
1 t. baking soda
1/4 t. salt
1/2 cup buttermilk
1/2 cup water
Frosting:
1 1/2 cups powdered sugar
1 (8 oz) pkg. cream cheese, softened
1/2 cup butter, softened
1/2 cup peanut butter
Start out with any chocolate cupcake recipe you like. I happen to have buttermilk in my fridge and wanted to use it up, so I used a standard buttermilk chocolate cupcake recipe. Start with a stick of butter, softened and 1 1/2 cups of sugar in your mixing bowl and cream together until light and fluffy.
Once it's fluffy, add 2 eggs, one at a time and beat well after each addition. Then beat in 1 teaspoon of vanilla.
In another bowl, combine 1 1/2 cups of all purpose flour, 1/2 cup of cocoa powder, 1 teaspoon of baking soda and 1/4 teaspoon of salt.
You will also need to combine 1/2 cup of buttermilk with 1/2 cup of water. Then add the dry ingredients to the butter mixture, alternating with the buttermilk mixture. In other words, add some dry then some wet, some dry and some wet, until all ingredients are incorporated. Then fill your cupcake cups 2/3 the way full and bake at 375 degrees for 15-20 minutes (make sure your toothpick inserted into the middle comes out clean).
Let the cupcakes cool in the pan for 10 minutes, then remove from the pan and let cool completely on a rack.
While the cupcakes cool, it's time to make this kick ass icing! You will need an 8 oz. block of cream cheese and a stick of butter, both softened, to start.
Beat until smooth and creamy. When you have a nice smooth butter/cream cheese mixture, add 1/2 cup of peanut butter. You can use creamy or chunky, but natural is probably not a good idea because of the oils. Beat in the peanut butter then add 1 1/2 cups of sifted powdered sugar. Beat until fully incorporated.
Ice cupcakes however the heck you want, but I suggest you load it on! This frosting is all kinds of yum and you don't want to short change yourself. Although, I suspect the leftovers might be pretty yummy on just about anything... toast, a bagel, a spoon, a hubcap, whatever. And feel free to add a bit extra peanut butter if you want. Personally, I think next time I make it I'm going to up it to 3/4 cup.
![]() |
| Money shot! |
Buon Cibo mia Amici.
Ingredient lists - Cupcakes:
1/2 cup butter, softened
1 1/2 cups sugar
2 eggs
1 t. vanilla
1 1/2 cups all purpose flour
1/2 cup cocoa powder
1 t. baking soda
1/4 t. salt
1/2 cup buttermilk
1/2 cup water
Frosting:
1 1/2 cups powdered sugar
1 (8 oz) pkg. cream cheese, softened
1/2 cup butter, softened
1/2 cup peanut butter
Saturday, October 31, 2009
Halloweeny Cakey Blog!
Now this is far more my style.
Several years ago I was at a garage sale and found a set of skull cake pans.
I had to have them. They were just too fun to pass up. Well they sat in a box for the next few years. But when I came up with an idea on how to ice them a few days ago, I decided to give them a try.
Because I wanted to make them edible, I decided to use my favorite chocolate cake recipe. This recipe makes two very big layers or four smaller layers. The skull pans are kind of small so I decided to make cupcakes with the leftover batter. The very cupcakes mentioned in the previous blog that hit the ground! Thank goodness it wasn't all of them though. I did keep about 10 at home, which Nick ended up taking to work. Aren't they cute!?

So, skull cakes. I used Crisco cooking spray on the pans and that was a mistake. The cakes stuck to the pan and basically were ruined.

Poor skull on the right totally had his face eaten off. The one on the left was OK... but still not great. If I had some actual talent I could have made this a zombie cake with it's face eaten off, but I really had no idea how to pull that off. And I still wanted to implement the idea I had so I baked another cake. I didn't use the original recipe though because I didn't have all the necessary ingredients now. Instead I made a mayonnaise cake because I did have all the ingredients for it. And this time I buttered and floured my cake pans. I melt the butter and brush the pans with a pastry brush, and then sprinkle the pans with flour. I'm not taking any chances for another sticking disaster!
It worked! The cakes came out of the pan perfectly and all the detail was showing. So here's my idea. I would cover the cakes with a white chocolate ganache (12 oz white chocolate, 1/2 cup of heavy cream - heat cream, pour over white chocolate, let set for 3 minutes, whisk until all the chocolate is melted, stir in Tablespoons of softened unsalted butter until smooth). While the ganache was still warm, but not hot, pour it over the cakes so it makes a glaze, covering the cakes in white chocolate.

Refrigerate and let the ganache set. Then, using a store bought black icing, because black is just too hard to make, fill in the detail. I started with the eyes.

From there I did the mouth. To do the mouth I squirted some of the icing out into a bowl and used a toothpick to fill in the teeth.

I don't have the steadiest hand, but I was honestly quite impressed that I did this well!
I contemplated not filling in the nose, but it looks a bit too much like an alien without the nose so I went ahead and did the nose too. But honestly, if you make green icing, this would be a pretty good alien.

Happy Halloween Everyone!!!! Oh and don't worry about the skull cakes that stuck to their pans. See all that ganache glaze in the bottom of the pan above? That was salvaged and gets melted down and poured over delicious hunks of chocolate cake. YUM.
Several years ago I was at a garage sale and found a set of skull cake pans.
I had to have them. They were just too fun to pass up. Well they sat in a box for the next few years. But when I came up with an idea on how to ice them a few days ago, I decided to give them a try.Because I wanted to make them edible, I decided to use my favorite chocolate cake recipe. This recipe makes two very big layers or four smaller layers. The skull pans are kind of small so I decided to make cupcakes with the leftover batter. The very cupcakes mentioned in the previous blog that hit the ground! Thank goodness it wasn't all of them though. I did keep about 10 at home, which Nick ended up taking to work. Aren't they cute!?

So, skull cakes. I used Crisco cooking spray on the pans and that was a mistake. The cakes stuck to the pan and basically were ruined.

Poor skull on the right totally had his face eaten off. The one on the left was OK... but still not great. If I had some actual talent I could have made this a zombie cake with it's face eaten off, but I really had no idea how to pull that off. And I still wanted to implement the idea I had so I baked another cake. I didn't use the original recipe though because I didn't have all the necessary ingredients now. Instead I made a mayonnaise cake because I did have all the ingredients for it. And this time I buttered and floured my cake pans. I melt the butter and brush the pans with a pastry brush, and then sprinkle the pans with flour. I'm not taking any chances for another sticking disaster!
It worked! The cakes came out of the pan perfectly and all the detail was showing. So here's my idea. I would cover the cakes with a white chocolate ganache (12 oz white chocolate, 1/2 cup of heavy cream - heat cream, pour over white chocolate, let set for 3 minutes, whisk until all the chocolate is melted, stir in Tablespoons of softened unsalted butter until smooth). While the ganache was still warm, but not hot, pour it over the cakes so it makes a glaze, covering the cakes in white chocolate.

Refrigerate and let the ganache set. Then, using a store bought black icing, because black is just too hard to make, fill in the detail. I started with the eyes.

From there I did the mouth. To do the mouth I squirted some of the icing out into a bowl and used a toothpick to fill in the teeth.

I don't have the steadiest hand, but I was honestly quite impressed that I did this well!
I contemplated not filling in the nose, but it looks a bit too much like an alien without the nose so I went ahead and did the nose too. But honestly, if you make green icing, this would be a pretty good alien.

Happy Halloween Everyone!!!! Oh and don't worry about the skull cakes that stuck to their pans. See all that ganache glaze in the bottom of the pan above? That was salvaged and gets melted down and poured over delicious hunks of chocolate cake. YUM.
Saturday, August 1, 2009
The Easiest Thing You'll Ever Make - Nutella Ravioli
Seriously. I mean it. It's a total no brainer. You need no skills, no special equipment, no degree in culinary arts. All you need is a pan with some oil in it (about 2 inches, vegetable oil).

A sheet pan lined with plastic wrap.

A package of won ton wrappers, an egg, and some Nutella. What? You don't know what Nutella is? Well let me tell you. It was created in the late 40's by an Italian fella named Pietro Ferrero. He lived in the Piedmont region of Italy where hazelnuts are grown. Pietro owned a bakery and originally sold Nutella in blocks but a few years later, he turned it into a spread. It's chocolatey and hazelnutty and just plain delicious on anything. You can usually find it on the peanut butter aisle. Buy it. You won't be sorry. And then you can make Nutella Ravioli! I buy mine in the big BJ's Warehouse Club econo jug.
So you need to heat your oil, probably to about 350. Get your won ton wrappers and your Nutella ready. Make your egg wash.... one egg beaten with about a Tablespoon of water.

On your work surface, whatever that may be... a board, a counter, whatever, lay out one won ton wrapper and brush the edges with egg wash.

The flour is already on the won ton wrapper. I didn't add it.
Drop a dollop (about a teaspoonful or so) in the middle of the wrapper.

Fold it over into a triangle and press along the edges to seal it. You can even crimp with a fork to seal it even more if you like. Then as you make them, line them up on the sheet pan lined with plastic wrap. When you get the tray filled or you've made as many as you want to make, check your oil temp (or not... I don't have a thermometer to check this temp so I just winged it, when I started to put the ravioli in the oil, if it sizzled and immediately started to fry, it was hot enough, but you don't want it too hot to burn the won tons either, so just be aware of what your oil is doing) and start the fryin!

I put no more than four in the pan at a time. If you crowd the pan, the temperature drops too much and then the ravioli's will end up too greasy. After about 20-30 seconds, flip the ravioli goodness over and continue cooking the other side. You're looking for a nice golden brown color.

Only one of them had a little accident and got a hold in it, spilling melty Nutella into the oil. It didn't matter, it was near the end anyway.

Once they are all done, you can sprinkle them with powdered sugar if you like, but we don't really go for that. We just had them straight up!

Make sure you serve them while they are still warm/hot and nice and oozy melty.

You can make these a day ahead and then reheat them in a low (250) oven. I'd probably wrap them in foil if I was doing that so they don't get too crispy crunchy. You can make a bunch and keep them in a low oven for serving later. But I doubt you'll be able to do that. Once you eat one, the rest will follow!

A sheet pan lined with plastic wrap.

A package of won ton wrappers, an egg, and some Nutella. What? You don't know what Nutella is? Well let me tell you. It was created in the late 40's by an Italian fella named Pietro Ferrero. He lived in the Piedmont region of Italy where hazelnuts are grown. Pietro owned a bakery and originally sold Nutella in blocks but a few years later, he turned it into a spread. It's chocolatey and hazelnutty and just plain delicious on anything. You can usually find it on the peanut butter aisle. Buy it. You won't be sorry. And then you can make Nutella Ravioli! I buy mine in the big BJ's Warehouse Club econo jug.
So you need to heat your oil, probably to about 350. Get your won ton wrappers and your Nutella ready. Make your egg wash.... one egg beaten with about a Tablespoon of water.

On your work surface, whatever that may be... a board, a counter, whatever, lay out one won ton wrapper and brush the edges with egg wash.

The flour is already on the won ton wrapper. I didn't add it.
Drop a dollop (about a teaspoonful or so) in the middle of the wrapper.

Fold it over into a triangle and press along the edges to seal it. You can even crimp with a fork to seal it even more if you like. Then as you make them, line them up on the sheet pan lined with plastic wrap. When you get the tray filled or you've made as many as you want to make, check your oil temp (or not... I don't have a thermometer to check this temp so I just winged it, when I started to put the ravioli in the oil, if it sizzled and immediately started to fry, it was hot enough, but you don't want it too hot to burn the won tons either, so just be aware of what your oil is doing) and start the fryin!

I put no more than four in the pan at a time. If you crowd the pan, the temperature drops too much and then the ravioli's will end up too greasy. After about 20-30 seconds, flip the ravioli goodness over and continue cooking the other side. You're looking for a nice golden brown color.

Only one of them had a little accident and got a hold in it, spilling melty Nutella into the oil. It didn't matter, it was near the end anyway.

Once they are all done, you can sprinkle them with powdered sugar if you like, but we don't really go for that. We just had them straight up!

Make sure you serve them while they are still warm/hot and nice and oozy melty.

You can make these a day ahead and then reheat them in a low (250) oven. I'd probably wrap them in foil if I was doing that so they don't get too crispy crunchy. You can make a bunch and keep them in a low oven for serving later. But I doubt you'll be able to do that. Once you eat one, the rest will follow!
Friday, June 26, 2009
Wilton Cake Decorating Class. Course 1, Week 4
Week four is our final week for Course 1 and that means only one thing... the dreaded rose. Granted, I totally psyched myself up for absolute failure. I'm just not at all artistic. But onward I went, armed with a cake that I won't have to throw out this week. I did use a boxed chocolate cake, but only because I had already bought it before I decided that my final exam should actually be edible.
I knew the decorating had to be done with the aforementioned vile buttercream but the actual cake could be icing with whatever we choose. So for my money, there is no better frosting than good old ganache. It is the absolute easiest thing in the world to make. All you need is one bag of semi-sweet chocolate chips put into a bowl and one cup of heavy cream. Heat the cream (but don't scorch it!) and then pour over the chocolate. Let sit for a couple minutes then whisk until smooth. Refrigerate for about an hour. If it's too hard to spread as a frosting, just microwave it in 10 second increments until you get the desired consistency. I used the ganache as my filling and as my frosting. I also brushed each layer of the cake with cold coffee, to give it a little something extra.
Now it's time, time to get down to the business of rose making. After asking around to the others in the class what color would go best with the chocolate frosting, pink seemed to be the consensus of what would go best. So pink it was. I colored my icing and we started practicing. Roses are not easy! They are in fact, quite a process from the base, to the wrap, to the petals (first three, then five, then seven!). Most of us seemed to really have trouble, especially with the icing staying smooth and not giving us a ruffled rose. This is my first attempt at a rose and you can see how ruffled it is, making it look more like a carnation than a rose.

Continuing on, we all worked very hard on our roses and quite frankly, I decided that if I were to pursue cake decorating I'd probably end up with carpal tunnel syndrome! It is very hard on the hands and the wrist.
We also practiced making leaves, stems and bows.
And now it was time to put our practice to use and decorate our cakes. Armed with six pink roses, I was ready to make my cake look special. To make it look like a bouquet, I put a little mountain of icing down first and then would place the roses on and around the mountain.

Switching to green icing now, it was time to make my leaves and my stems.

You can probably tell that I still have a bit if a shaky hand. My stems are a little squiggly.

I was actually rather pleased with how the leaves came out. So much so that instead of doing a bow, I decided to instead make more leaves.

Once I was finished, I decided to try my hand again at the shell border. I'm having a bit of a difficult time with my positioning on making the shell border, but I think I can improve with practice. I always found that shell borders look very nice on cakes.

It was not coming out at all how I had hoped so I switched to a star border mid way though. That was looking much better.

And here is my diploma! I had a great time in the class. And loved meeting everyone who took it at the same time. Thanks to our great teacher Alicia and to Patty for taking the class withe me! And special thanks to Rhett for my cool little surprise :)

I'm hoping to take Course 2 in July, but it may end up being canceled due to not enough people signing up for the class. If that's the case, they offer it again in October, so I'll just take it then.
I knew the decorating had to be done with the aforementioned vile buttercream but the actual cake could be icing with whatever we choose. So for my money, there is no better frosting than good old ganache. It is the absolute easiest thing in the world to make. All you need is one bag of semi-sweet chocolate chips put into a bowl and one cup of heavy cream. Heat the cream (but don't scorch it!) and then pour over the chocolate. Let sit for a couple minutes then whisk until smooth. Refrigerate for about an hour. If it's too hard to spread as a frosting, just microwave it in 10 second increments until you get the desired consistency. I used the ganache as my filling and as my frosting. I also brushed each layer of the cake with cold coffee, to give it a little something extra.
Now it's time, time to get down to the business of rose making. After asking around to the others in the class what color would go best with the chocolate frosting, pink seemed to be the consensus of what would go best. So pink it was. I colored my icing and we started practicing. Roses are not easy! They are in fact, quite a process from the base, to the wrap, to the petals (first three, then five, then seven!). Most of us seemed to really have trouble, especially with the icing staying smooth and not giving us a ruffled rose. This is my first attempt at a rose and you can see how ruffled it is, making it look more like a carnation than a rose.

Continuing on, we all worked very hard on our roses and quite frankly, I decided that if I were to pursue cake decorating I'd probably end up with carpal tunnel syndrome! It is very hard on the hands and the wrist.
We also practiced making leaves, stems and bows.
And now it was time to put our practice to use and decorate our cakes. Armed with six pink roses, I was ready to make my cake look special. To make it look like a bouquet, I put a little mountain of icing down first and then would place the roses on and around the mountain.

Switching to green icing now, it was time to make my leaves and my stems.

You can probably tell that I still have a bit if a shaky hand. My stems are a little squiggly.

I was actually rather pleased with how the leaves came out. So much so that instead of doing a bow, I decided to instead make more leaves.

Once I was finished, I decided to try my hand again at the shell border. I'm having a bit of a difficult time with my positioning on making the shell border, but I think I can improve with practice. I always found that shell borders look very nice on cakes.

It was not coming out at all how I had hoped so I switched to a star border mid way though. That was looking much better.

And here is my diploma! I had a great time in the class. And loved meeting everyone who took it at the same time. Thanks to our great teacher Alicia and to Patty for taking the class withe me! And special thanks to Rhett for my cool little surprise :)

I'm hoping to take Course 2 in July, but it may end up being canceled due to not enough people signing up for the class. If that's the case, they offer it again in October, so I'll just take it then.
Friday, May 29, 2009
A Variation on an Old Fave
I think it's pretty much a given at this point that I love brownies. I specifically love Nick Malgeri's Supernatural brownies, as witnessed here and here. Well I couldn't help myself, I had to try to come up with yet another way to mess with them. This time... mint.
I wanted to incorporate a nice mint flavor that wouldn't be too overpowering so I went to and old favorite of mine, Andes Mints.

Once you make the brownie batter (you will find the recipe by following the links above), pour half into your prepared 9 x 13 pan and then line up the mints over the batter.

Two boxes of mints was the perfect amount. I didn't even get to sneak one while I was doing all that unwrapping (56 mints in all). Then pour the rest of the batter over the top of the mints and smooth out. You can't even see the mints after you do this and will end up being a nice little surprise when they are done.
Bake for 45 minutes at 350. The brownie aroma is intoxicating!
They came out just as I had hoped, delicious and slightly minty but not overpowering. Some of the mints completely melt and disappear into the batter, so do not. YUM!

I wanted to incorporate a nice mint flavor that wouldn't be too overpowering so I went to and old favorite of mine, Andes Mints.

Once you make the brownie batter (you will find the recipe by following the links above), pour half into your prepared 9 x 13 pan and then line up the mints over the batter.

Two boxes of mints was the perfect amount. I didn't even get to sneak one while I was doing all that unwrapping (56 mints in all). Then pour the rest of the batter over the top of the mints and smooth out. You can't even see the mints after you do this and will end up being a nice little surprise when they are done.
Bake for 45 minutes at 350. The brownie aroma is intoxicating!
They came out just as I had hoped, delicious and slightly minty but not overpowering. Some of the mints completely melt and disappear into the batter, so do not. YUM!

Tuesday, May 5, 2009
Oh No She Didn't!!!
Oh yes she did.
I decided to use up a few things I had in my pantry that I bought for something I never ended up making or bought in the hopes of using it for something and never did, or what have you. Looking at these things I did the only logical conclusion I could come to was cookies.
So I turned to Martha. Martha has a pretty decent peanut butter cookie recipe and it seemed like peanut butter cookie would make the best base for what I had in mind. So start out with two sticks of softened butter and cream that with 1/2 cup of granulated sugar and 1/2 cup brown sugar.

Beat until pale and fluffy. Add one egg and mix well. Then add 1/2 teaspoon of vanilla extract and 1 cup of smooth peanut butter. I used smooth because I had it, but I see nothing wrong with using chunky.
For the dry ingredients, sift together 1 and 1/4 cups of flour with 3/4 teaspoon of baking soda. Add this to the peanut butter mixture and mix until just combined.

OK, now the good stuff. To the cookie base I added one 4 oz. bar of Nestle Chocolatier (bittersweet), cut into chunks.

One cup of peanut butter chips.

And three Butterfinger bars, cut into chunks.

Oh. My. God.
Mix everything together quickly so as not to break the chunks of chocolate or Butterfinger too small.

Then scoop out with a cookie scoop or if you don't have one of those, roll into about one inch size balls and place 2 inches apart on an ungreased cookie sheet. There is no need to press them down with a fork like you would with regular peanut butter cookies. These spread out all on their own.

Bake at 350 for 10 minutes, then when you remove them from the oven, let them sit in the tray for about 5-8 minutes before removing them to a cooling rack.
They are crispy but still chewy and soft.

They are sweet, but not unbearably so. They are oh so very yummy!!!!

Peanut Butter Cookies (ingredient list)
courtesy of Martha Stewart's Cookies
1 1/4 cup all purpose flour
3/4 teaspoon baking soda
1 cup (2 sticks) unsalted butter, room temperature
1/2 cup granulated sugar
1/2 cup light brown sugar
1 large egg
1/2 teaspoon vanilla extract
1 cup smooth peanut butter
1/2 cup salted peanuts
I decided to use up a few things I had in my pantry that I bought for something I never ended up making or bought in the hopes of using it for something and never did, or what have you. Looking at these things I did the only logical conclusion I could come to was cookies.
So I turned to Martha. Martha has a pretty decent peanut butter cookie recipe and it seemed like peanut butter cookie would make the best base for what I had in mind. So start out with two sticks of softened butter and cream that with 1/2 cup of granulated sugar and 1/2 cup brown sugar.

Beat until pale and fluffy. Add one egg and mix well. Then add 1/2 teaspoon of vanilla extract and 1 cup of smooth peanut butter. I used smooth because I had it, but I see nothing wrong with using chunky.
For the dry ingredients, sift together 1 and 1/4 cups of flour with 3/4 teaspoon of baking soda. Add this to the peanut butter mixture and mix until just combined.

OK, now the good stuff. To the cookie base I added one 4 oz. bar of Nestle Chocolatier (bittersweet), cut into chunks.

One cup of peanut butter chips.

And three Butterfinger bars, cut into chunks.

Oh. My. God.
Mix everything together quickly so as not to break the chunks of chocolate or Butterfinger too small.

Then scoop out with a cookie scoop or if you don't have one of those, roll into about one inch size balls and place 2 inches apart on an ungreased cookie sheet. There is no need to press them down with a fork like you would with regular peanut butter cookies. These spread out all on their own.

Bake at 350 for 10 minutes, then when you remove them from the oven, let them sit in the tray for about 5-8 minutes before removing them to a cooling rack.
They are crispy but still chewy and soft.

They are sweet, but not unbearably so. They are oh so very yummy!!!!

Peanut Butter Cookies (ingredient list)
courtesy of Martha Stewart's Cookies
1 1/4 cup all purpose flour
3/4 teaspoon baking soda
1 cup (2 sticks) unsalted butter, room temperature
1/2 cup granulated sugar
1/2 cup light brown sugar
1 large egg
1/2 teaspoon vanilla extract
1 cup smooth peanut butter
1/2 cup salted peanuts
Thursday, June 12, 2008
Chocolate Cake Part II
After my last chocolate cake blog, where I used a recipe that purported itself as "the best chocolate cake you ever ate" I knew I had to keep searching. It so was not the best chocolate cake I ever ate. The cinnamon in it was a bit off putting and the glaze/frosting was insanely sweet (and I even cut down on the sugar it called for!). I continued my search and found a recipe that sounded more like what I was going for at Epicurious.com. I was right. This recipe is a keeper!!
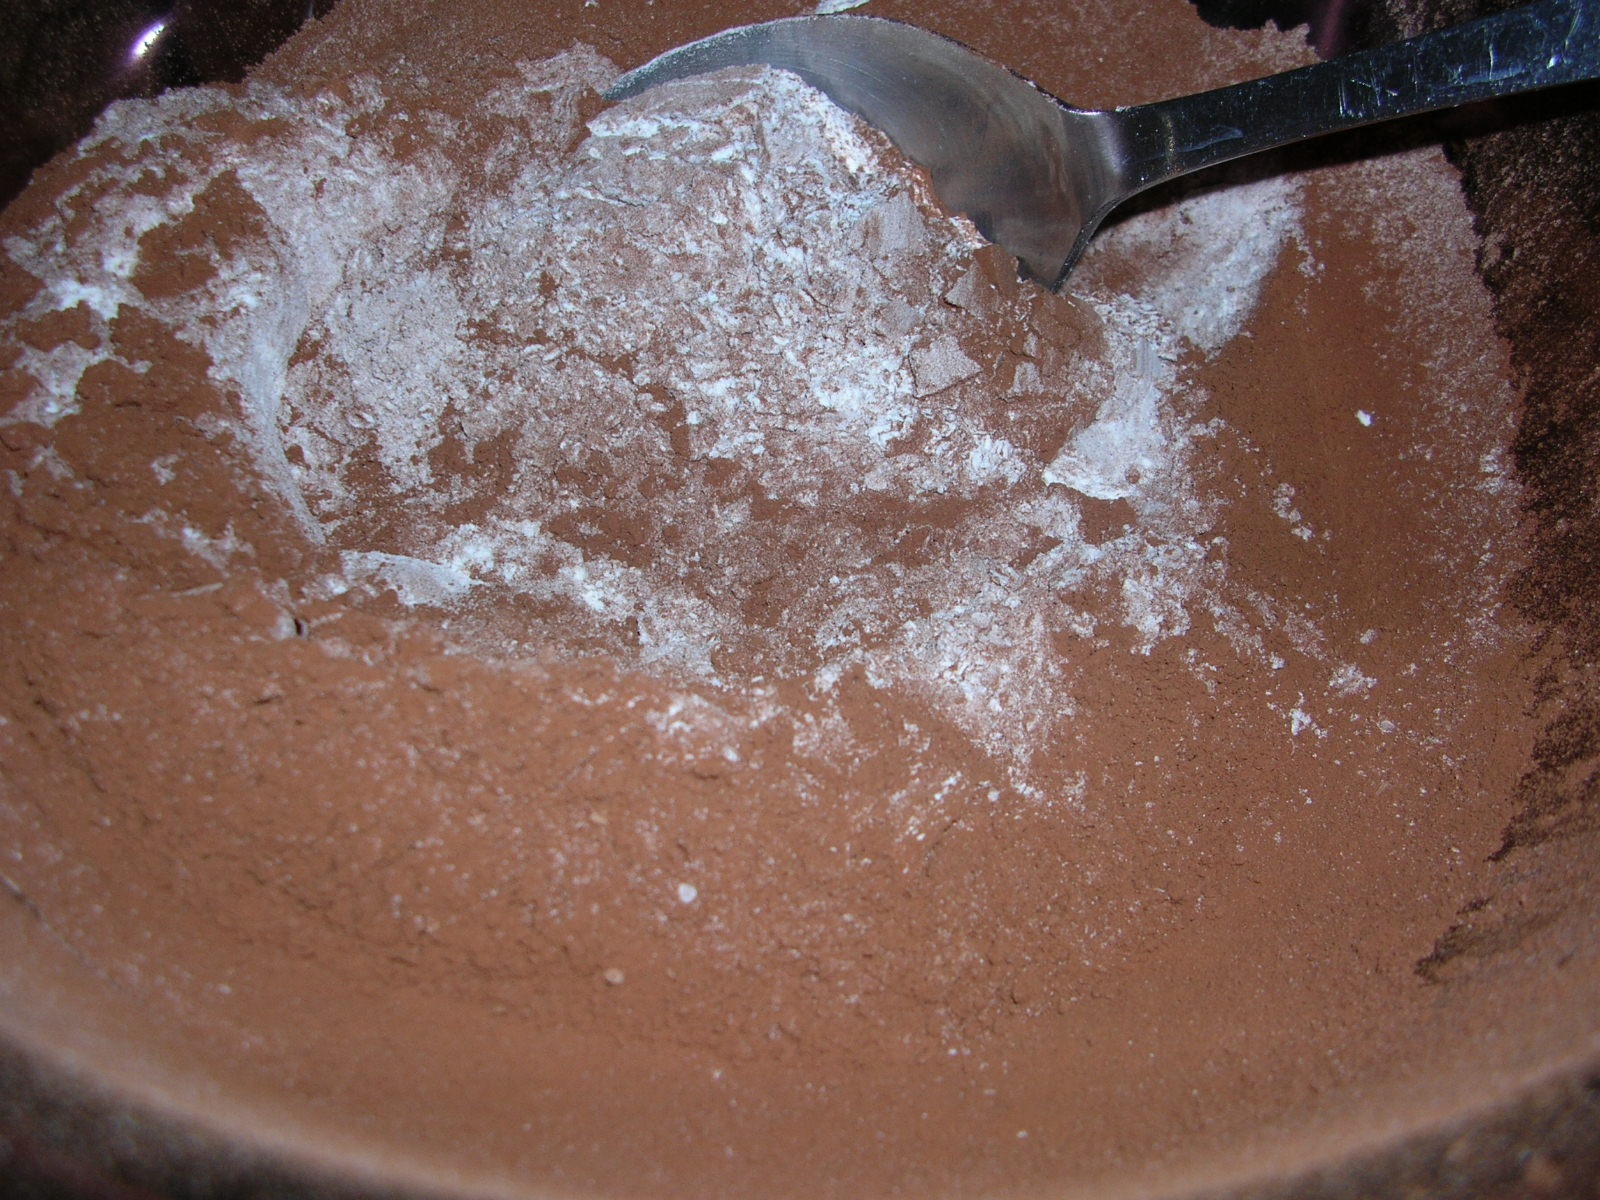
You start by sifting together the sugar, flour, cocoa powder, baking soda, baking powder, and salt and set aside.

Then in another bowl, take 3 oz. of a good semi-sweet chocolate and pour one and a half cups of hot fresh brewed coffee over it. Let sit for a few minutes, stirring occasionally until mixture is smooth. Set aside. Since I was testing the recipe, I didn't go all out with fancy chocolate and just used Nestle's chocolate chips and you know what, it was great! You will need two bags for this recipe.

Now, in your mixer, beat the eggs until they start to thicken and turn a lemony color. It doesn't take long in a Kitchen Aid stand mixer but may take a little longer with a hand mixer. Slowly add the other wet ingredients: oil, buttermilk, vanilla, and melted chocolate mixture to the mixer and beat until combined. Then add flour/sugar mixture and beat on medium until just combined. I put the whole bowl of flour/sugar in all at once. Once it's all combined, divide batter between pans. Your pans should be greased and lined with wax paper. The recipe calls for 10 inch cake pans, but I used my 9 x 3 inch cake pans. DO NOT use a regular 9 inch pan or it will spill over the sides and cause a mess in your oven like this. But if you want to make three layers instead of two, I think the regular 9 inch pans will work.

Bake for 1 hour to 1 hour and 10 minutes, or until a toothpick inserted into the middle comes out clean. Then cool the cakes completely in their pans on wire racks. When cooled, turn out onto the racks and remove wax paper.
While the cakes are baking, make the ganache frosting. Oh ganache. Is there anything better?? I don't think so. It's simple but enhances whatever it is on. The recipe calls for a few more ingredients than I used, but you can do it how you want. I prefer to stay away from corn syrup as much as possible so I left it out. And I also don't think ganache needs any added sugar. I did however use the butter it called for. You will need one pound of semi-sweet chocolate in a bowl and one cup of heavy cream. Heat the cream and then pour over the chocolate. Let sit for a couple minutes then whisk until smooth. Add the butter slowly in pieces and whisk until completely smooth. You may have to refrigerate the ganache to get it to a spreadable consistency.
This cake is VERY moist. I got the first layer on the plate easily, spread some ganache on it and then when I went to put the second layer on, it broke right in half. Frosting covers many flaws so I wasn't worried about it at all, but hopefully it won't happen again. The picture shows that the cake was pieced back together, but I'm not sure you can really tell.

The ganache frosting is a beautiful consistency and a great cake topper. It's terrific! It spreads nicely, doesn't leave a ton of crumbs behind and looks glossy and beautiful. Just for kicks, I put chocolate cookie crumbs on the side of the cake.


This is by far, closer to the best chocolate cake I ever ate! Even my Nick loved it and he's not much for cakes. In fact, whenever I make a cake that he likes, he gets mad telling me I'm trying to change him into a cake lover!
You start by sifting together the sugar, flour, cocoa powder, baking soda, baking powder, and salt and set aside.

Then in another bowl, take 3 oz. of a good semi-sweet chocolate and pour one and a half cups of hot fresh brewed coffee over it. Let sit for a few minutes, stirring occasionally until mixture is smooth. Set aside. Since I was testing the recipe, I didn't go all out with fancy chocolate and just used Nestle's chocolate chips and you know what, it was great! You will need two bags for this recipe.

Now, in your mixer, beat the eggs until they start to thicken and turn a lemony color. It doesn't take long in a Kitchen Aid stand mixer but may take a little longer with a hand mixer. Slowly add the other wet ingredients: oil, buttermilk, vanilla, and melted chocolate mixture to the mixer and beat until combined. Then add flour/sugar mixture and beat on medium until just combined. I put the whole bowl of flour/sugar in all at once. Once it's all combined, divide batter between pans. Your pans should be greased and lined with wax paper. The recipe calls for 10 inch cake pans, but I used my 9 x 3 inch cake pans. DO NOT use a regular 9 inch pan or it will spill over the sides and cause a mess in your oven like this. But if you want to make three layers instead of two, I think the regular 9 inch pans will work.

Bake for 1 hour to 1 hour and 10 minutes, or until a toothpick inserted into the middle comes out clean. Then cool the cakes completely in their pans on wire racks. When cooled, turn out onto the racks and remove wax paper.
While the cakes are baking, make the ganache frosting. Oh ganache. Is there anything better?? I don't think so. It's simple but enhances whatever it is on. The recipe calls for a few more ingredients than I used, but you can do it how you want. I prefer to stay away from corn syrup as much as possible so I left it out. And I also don't think ganache needs any added sugar. I did however use the butter it called for. You will need one pound of semi-sweet chocolate in a bowl and one cup of heavy cream. Heat the cream and then pour over the chocolate. Let sit for a couple minutes then whisk until smooth. Add the butter slowly in pieces and whisk until completely smooth. You may have to refrigerate the ganache to get it to a spreadable consistency.
This cake is VERY moist. I got the first layer on the plate easily, spread some ganache on it and then when I went to put the second layer on, it broke right in half. Frosting covers many flaws so I wasn't worried about it at all, but hopefully it won't happen again. The picture shows that the cake was pieced back together, but I'm not sure you can really tell.

The ganache frosting is a beautiful consistency and a great cake topper. It's terrific! It spreads nicely, doesn't leave a ton of crumbs behind and looks glossy and beautiful. Just for kicks, I put chocolate cookie crumbs on the side of the cake.


This is by far, closer to the best chocolate cake I ever ate! Even my Nick loved it and he's not much for cakes. In fact, whenever I make a cake that he likes, he gets mad telling me I'm trying to change him into a cake lover!
Subscribe to:
Posts (Atom)